Selecting what you want
Why “select” things?
Many of the "runPlugin" based commands like Cell Detection, or the Simple Thresholder and Pixel Classifier functions require an object to be selected in order to know what region of the image to process. That makes it very important to pay attention to what is selected at certain points in a script, as selections are not always included in the Workflow.
Issues with selections often come up when the user manually selects an annotation, and then runs Cell Detection within it, followed by generating a script in the Workflow. In this case, the manual selection is not included in the Workflow. Likewise, if an annotation is drawn manually (and so it is still selected), that will not show up in the Workflow as well.
If you deselect all objects, then run Cell Detection, you will get a popup asking which objects you want to select! If you make a selection, that choice will be included in the Workflow tab, as it is generally applicable ("Annotations", for instance).

Since a region was chosen automatically through the dialog, selectAnnotations() will show up in the Workflow tab.

The code shows up in the Workflow since the program selected the region to run the cell detection, not the user.
Even when you want to do something simple, it is important to be aware of what object in the image you are targeting. If you have ever tried to run cell detection on an empty image (no annotations exist), you will know from the error message that having your objects in the right "state" is important!
The easiest ways to select objects are with the built in commands:
selectAnnotations()
selectDetections()
selectAllObjects()
selectTMACores()
One special case is:
createSelectAllObject(true)
which both creates an object with the dimensions of the image AND selects it… as long as you pass it true as an argument. Put false in the parentheses if you want the whole image annotation rectangle to not be selected.
If you want to work within only a certain class or classes of objects, that is easy as well!
selectObjectsByClassification("Necrosis", "Tumor");
Running that line will select all Tumor and Necrosis objects - regardless of whether they are cells or annotations!
Also useful is making sure that you have nothing selected.
resetSelection()
Sometimes you may want to collect objects to manually manipulate them - not necessarily use one of QuPath’s built in features that requires selection. Selecting things is actually kind of slow - it is much faster to have a way to target certain objects.
One of the most common reasons to do this is to work with a subset of cells that are within a particular annotation object. Here I will target the cells within annotations that are classified "Tumor," like the situation shown below (also accessible through the demo project).
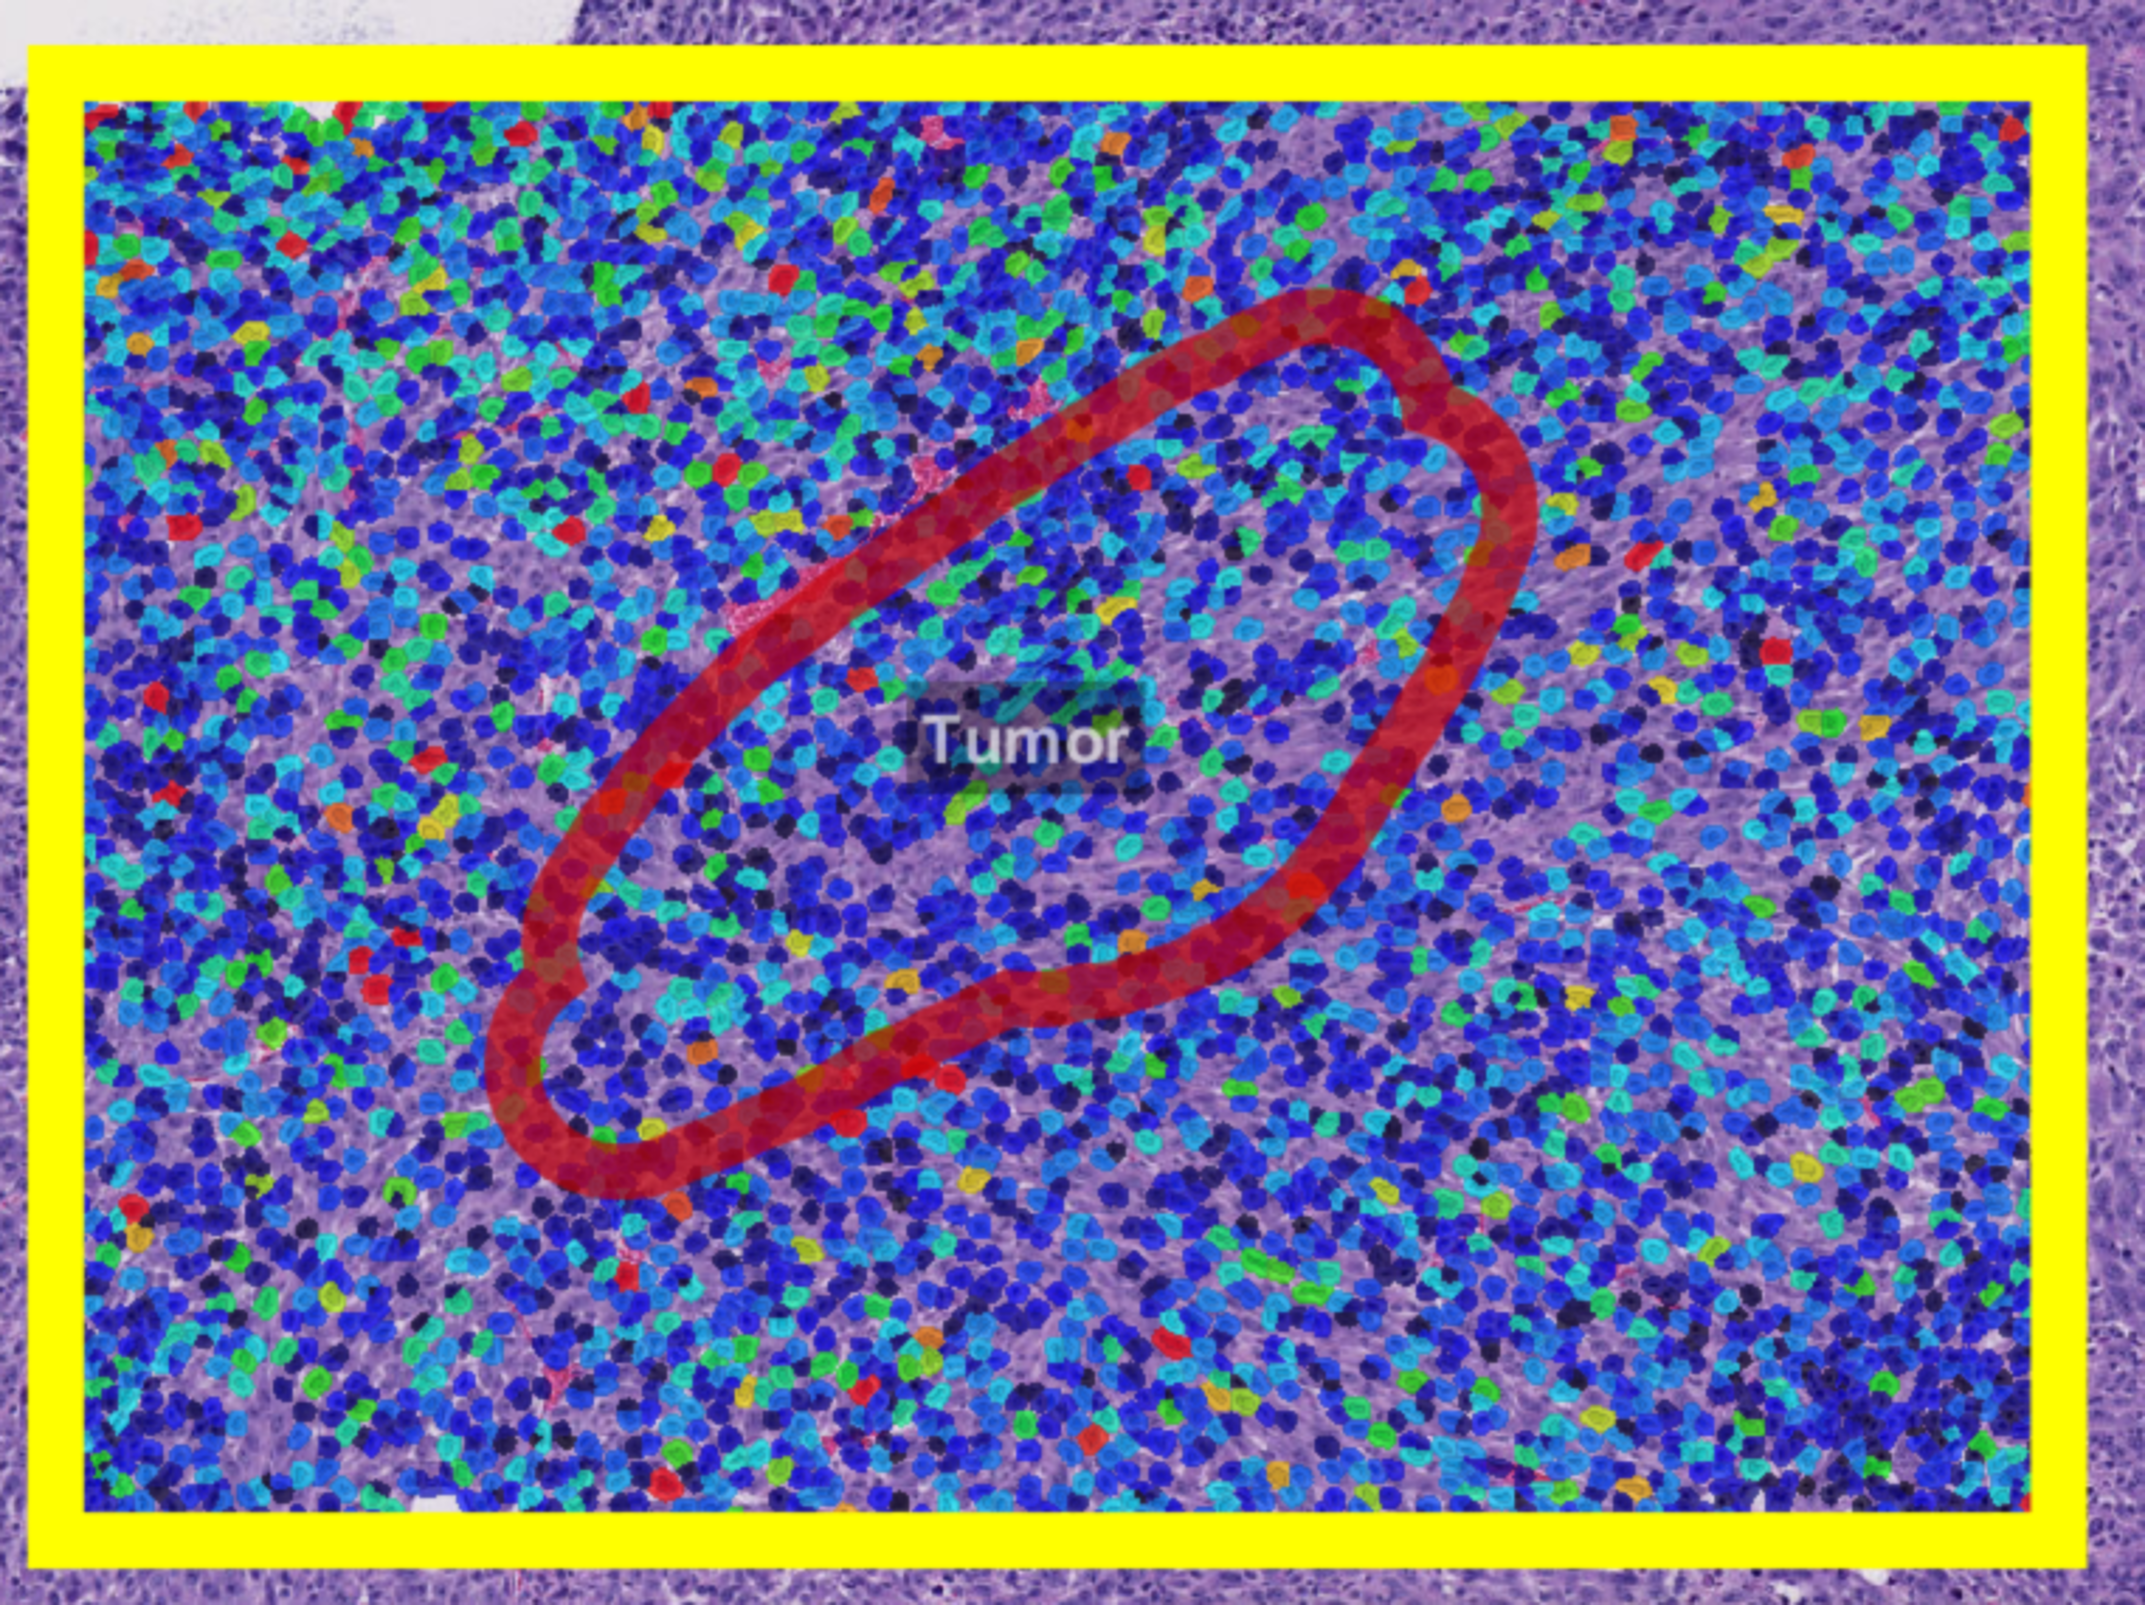
A annotation given the classification “Tumor” was drawn on top of cells generated inside of an unclassified rectangle.
Draw a rectangle annotation, run cell detection inside of it, then draw another annotation on top and classify it as Tumor (right click on the annotation as soon as you are done drawing it to access the context menu, and then select Tumor from the Set class menu.
tumorAnnotations = getAnnotationObjects().findAll{it.getPathClass() == getPathClass("Tumor")}
tumorAnnotations.each{anno->
    tumorCells = getCurrentHierarchy().getObjectsForROI(qupath.lib.objects.PathDetectionObject, anno.getROI())
}
Do not worry about the “each” loop, I will get to those next! Suffice to say, you could draw multiple Tumor annotations and the script would still work.
First we created a list of all tumor annotations (in this case, a list of 1!), and then we cycled through that list to get the detection objects that are within that tumor annotation. The result is "tumorCells", a list of cells within the tumor area. Notice that I did not actually use the annotation for the second argument, it takes the ROI - "anno.getROI()". That will open up some interesting possibilities in the future!
For now, though, I could expand on the script above to find the total "cell area" (it is not really the “cell area,” since cytoplasms in QuPath are currently approximations) within the tumor annotation. Notice I created the tumorCells variable above, and then use it to go through each cell in the code below. For this to work, you would need one big script! Variables do not persist after a script is complete.
totalArea = 0
tumorCells.each{cell->
    totalArea = totalArea + measurement(cell, "Cell: Area")
}
print totalArea
Finally, there is a more specific and controlled selection method that takes a little bit more coding. QuPath uses a SelectionModel to keep track of what objects are currently selected, and you can add any object to this model individually using:
getCurrentHierarchy().getSelectionModel().setSelectedObject(it, true);
where "it" is the object. I could re-use the above code to select the cells within the Tumor annotation .
tumorAnnotations = getAnnotationObjects().findAll{it.getPathClass() == getPathClass("Tumor")}
tumorAnnotations.each{anno->
    tumorCells = getCurrentHierarchy().getObjectsForROI(qupath.lib.objects.PathDetectionObject, anno.getROI())
}
tumorCells.each{cell->
    getCurrentHierarchy().getSelectionModel().setSelectedObject(cell, true);
}
The code is a bit unwieldy since each object is being selected one at a time, but .setSelectedObjects(tumorCells) could also be used instead of the tumorCells.each loop. After selecting the cells, we could also include a clearSelectedObjects() line to remove the cells within that tumor annotation!

Before clearSelectedObjects()

After clearSelectedObjects()
For the above images, I changed the Default object color in Preferences (gear icon, upper right) to white in order to better contrast with the Tumor, since the default Default object color is red!
In the next section, I will go into the loops we saw here in a bit more detail, since almost everything you want to do to one object in QuPath, you want to do to many objects!