Creating a project
The YouTube video goes through the process of creating a project, which contains information to connect the data and objects in your images to the correct image. When using QuPath you are never modifying the pixels in your image (though you can export modified images). Your objects are merely an overlay in a separate data file which needs to be associated in some way with the base image.
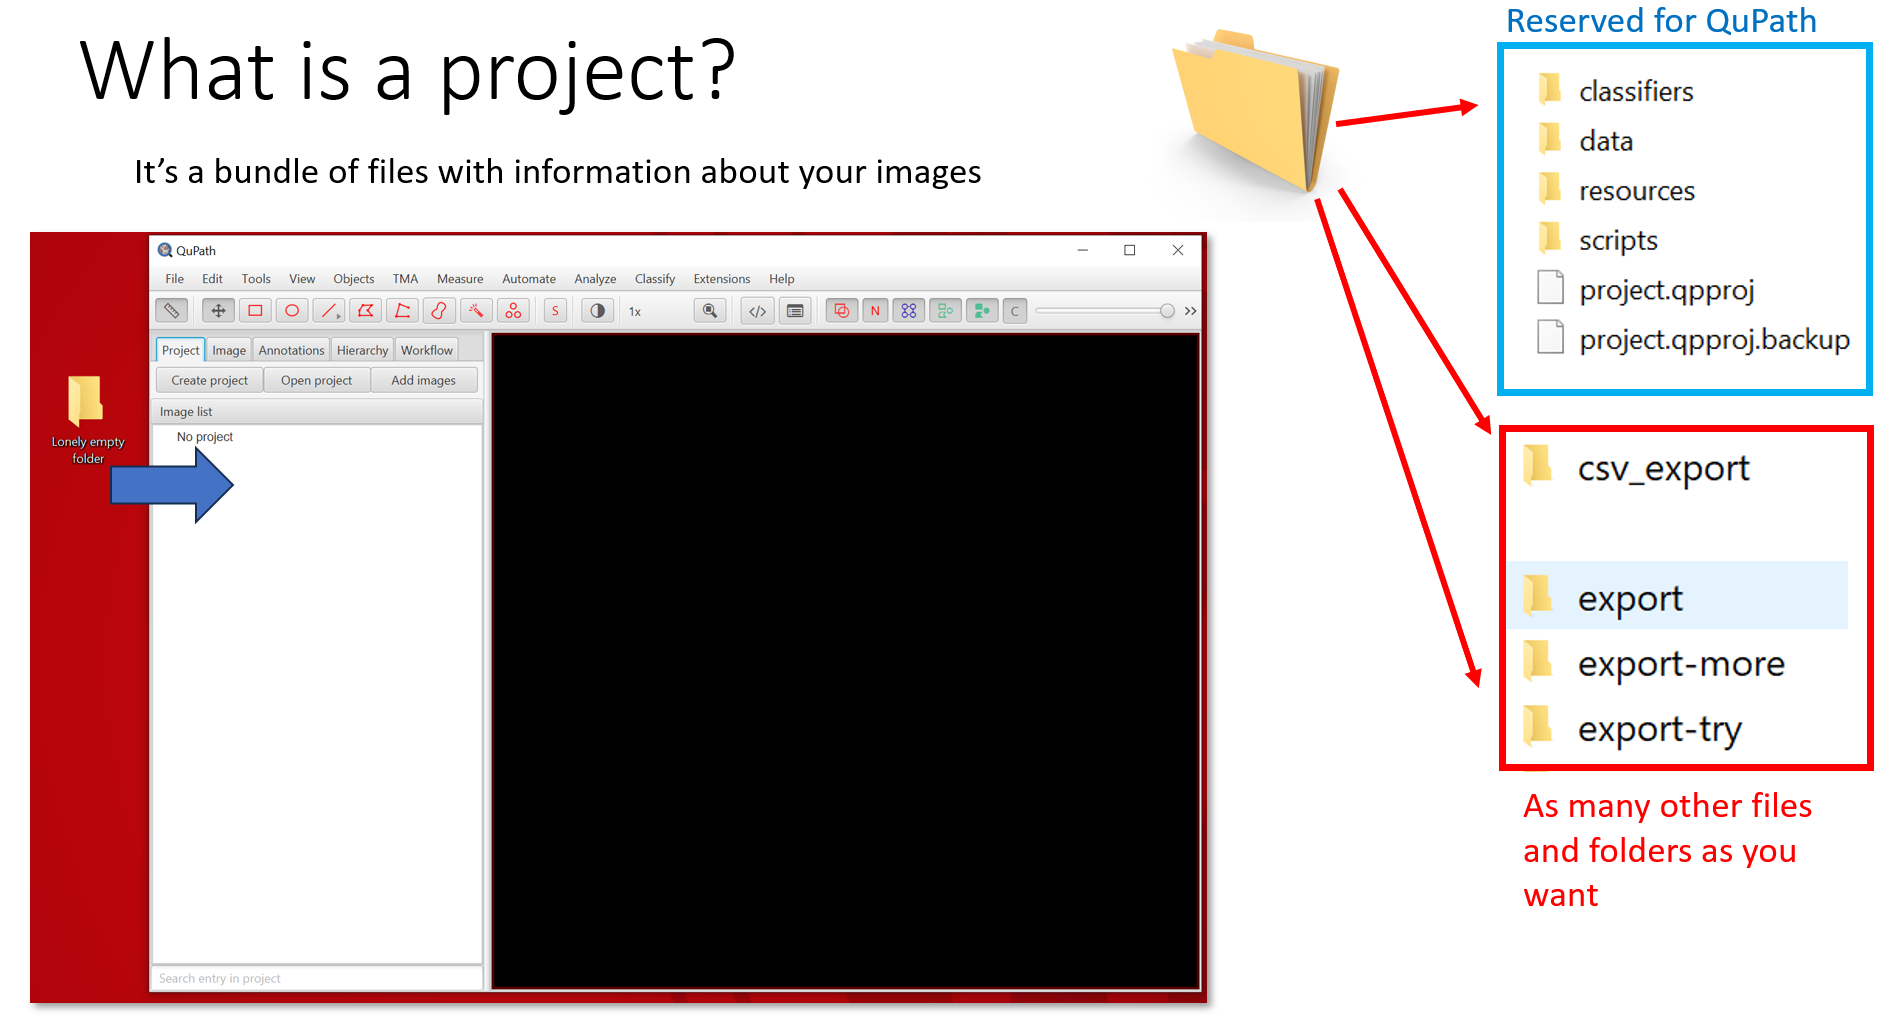
The empty folder you first create to start a project is what allows QuPath to bring all sorts of information relevant to your analysis together in one place, and keep track of everything from exported data, to object and pixel classifiers, to information about the brightness and contrast settings.
In the following introduction of our workshop, From Samples to Knowledge 2023, I describe the creation of a project, and the various components that go into it. Though this is a single brightfield image, most of the concepts are the same.
 Note
Note
Projects are how QuPath handles multiple image files and keeps track of classifiers, scripts, image data, and visualization settings that are relevant to those image files. While it is possible to run scripts on images using QuPath from the command line, that should only be for high throughput settings and non-standard use cases - most of the time the project structure will be useful to you as it allows the user to jump around between images, visualize what is going on, and provides a handy location for all of the files related to a particular, well, project. You also get to benefit from QuPath’s wonderful user interface!
The "project" always starts as an empty folder that you as the user populate as you add images and create objects within your entries. At its core, a project is the contents of that folder, consisting of a .qpproj text file that holds everything together and contains pointers to the various images that are added to the project. Once an image is added, QuPath will also create 'data' and ‘classifiers’ folders. As you begin to interact with an image, including modifying the display settings, adjusting color vectors, or creating objects, other folders or subfolders will be populated. Commonly created folders include 'scripts', ‘resources’ and 'classifiers'. DO NOT RENAME THESE AUTOMATICALLY CREATED FOLDERS.
Despite usually not wanting to modify QuPath’s automatically created files, user created files and folders can be added as well. These should not interfere with the functionality of QuPath as long as you do not use the basic 'data' 'classifiers' and 'scripts' folders. Additional folders might take the form of an 'exports' folder that contains subfolders for 'spreadsheets' and 'images'.
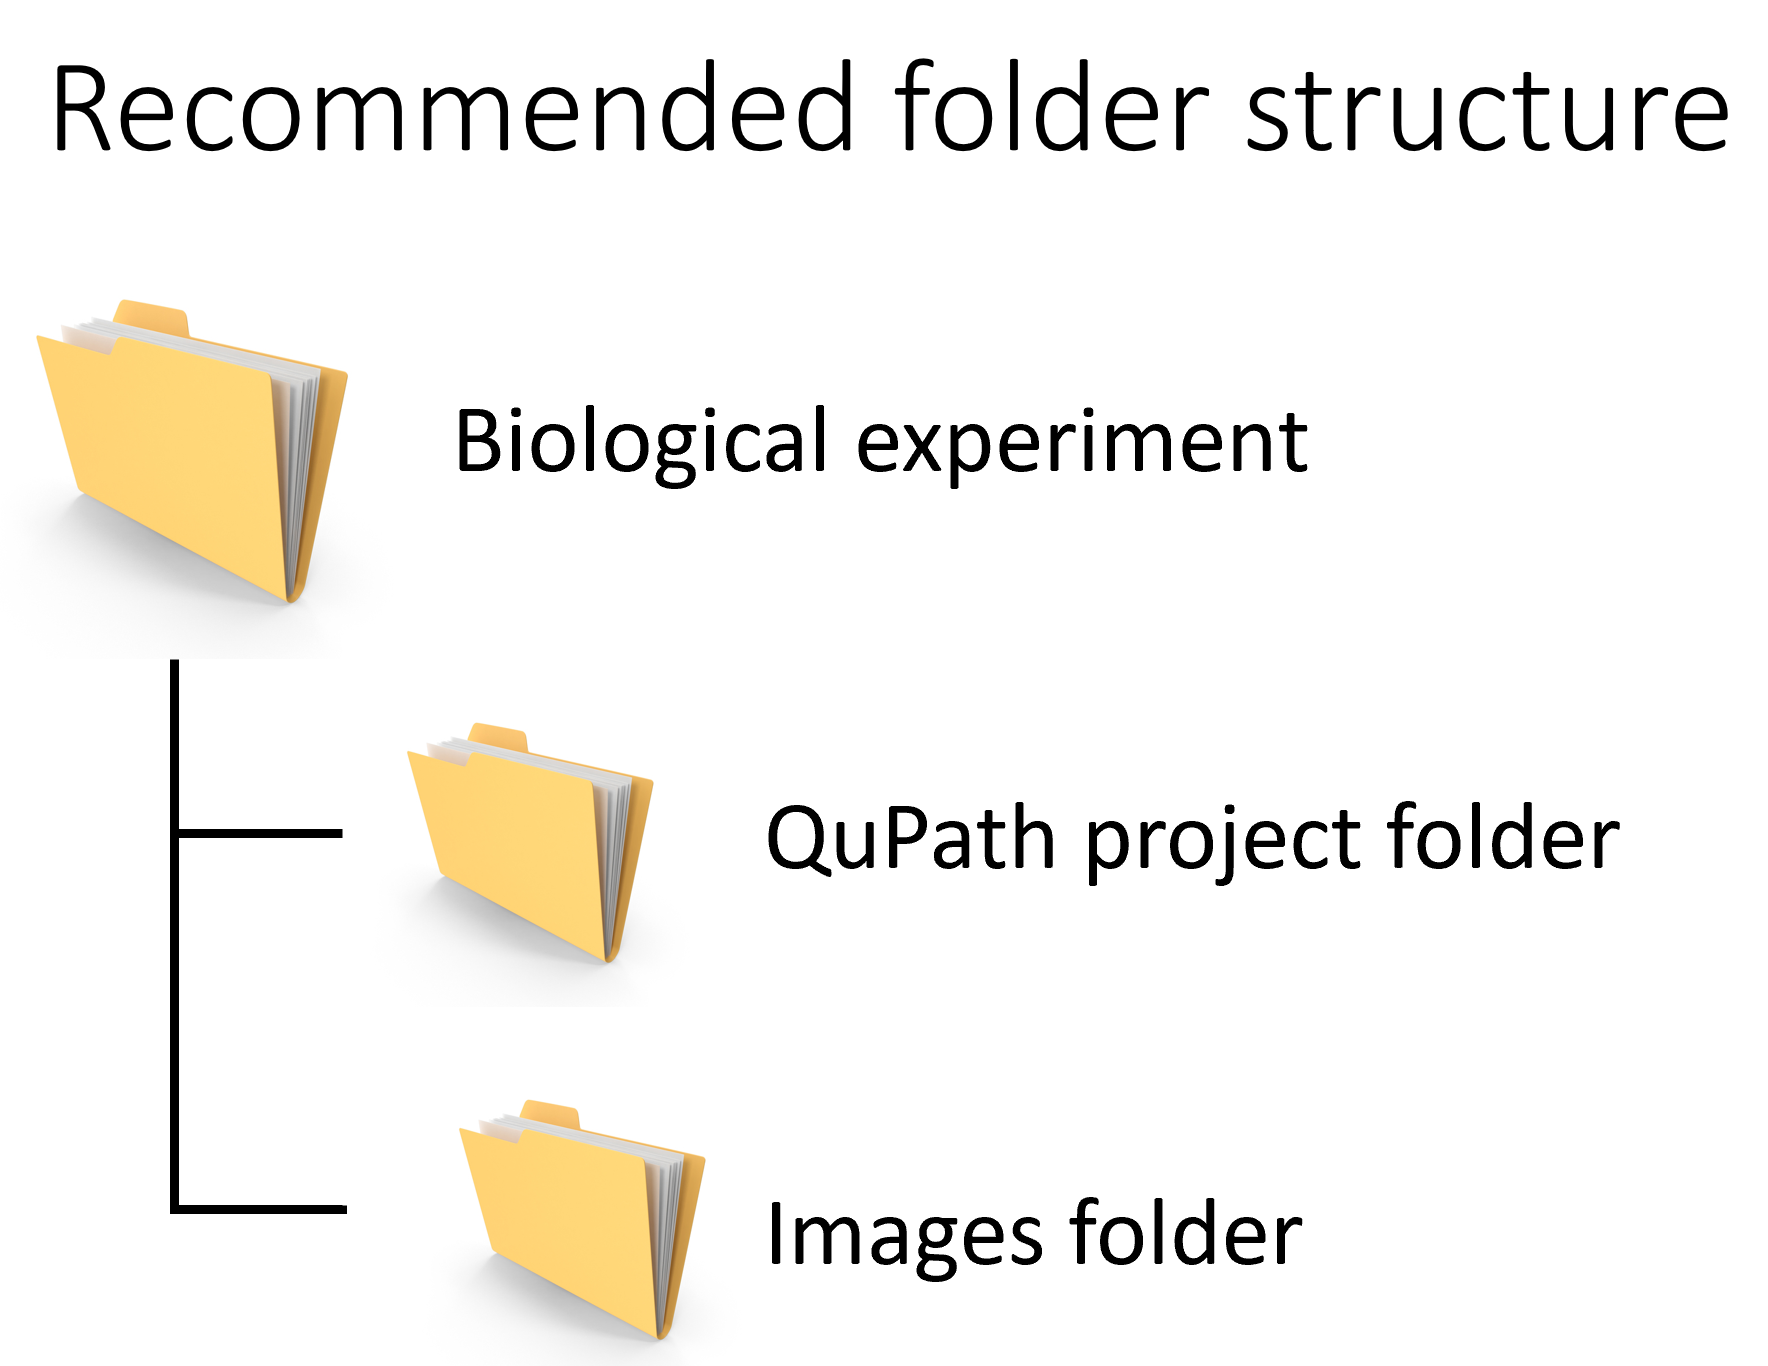
You can also choose to include the images within the project folder in a folder of your choice, and this can make for a nice self-contained location for all of your data. In many cases I no longer suggest that, as it makes duplicating/backing up the project itself require far more space and time. Whole slide images are often the largest part of the project. For this exercise, I will recommend not storing the images within the project folder.
As an overview in the video, we create a project, add some images, duplicate the project, then modify one of the projects to show the creation of the folders.
Adding multiple images will fail without a project. QuPath needs to have that folder so there is a place to store the data associating the images with each other. That location can be on a shared network drive where multiple people have access to it. Potentially, multiple people could modify the data at the same time, so use that with care as the most recent save will overwrite any others.
Adding the images can be done in a variety of ways, but the easiest for now is to drag and drop the images we have in. You can see that they do not start with a thumbnail, but that is created when they are first accessed. Some file types, including most vendor formats, already have a pregenerated thumbnail that QuPath can access, and will show that thumbnail automatically.
Adding images populates the 'data' and 'classifiers' folders. Removing an image and also deleting its associated data removes that image's folder from the 'data' folder. When you first add an image to a project, the only thing with it’s data folder should be a thumbnail, usually in .jpg format. If you have auto-detect image type turned on, you may get slightly more than that.
Next, duplicate the folder and rename the new folder.
Opening the project can be done with either the .qpproj file or the folder itself via drag and drop. The File menu can also be used to find Recent projects… quickly.
One of the great parts about having workshops related to QuPath are the ideas that come out of it. Often, in retrospect, these seem obvious, but this one really stood out. The suggestion made by Kenneth Kim, a veterinary pathologist at LJI, was as follows:
Use a parent folder to keep all of the data for a given project together, but then keep the “project” and “images” folders at the same level. That way, you can transfer or duplicate the QuPath project and data files easily without duplicating all of the images. It also keeps the images in close proximity to the QuPath project in case any new images need to be added.
Project errors!
If you run into errors opening your project, there are two main ways to try and solve this.
Go to the gear in the upper right corner of the QuPath interface, or Edit->Preferences in the menus, and choose to Reset Preferences
Alternatively, if your QuPath crashed while attempting to run a script or perform some sort of analysis or import, the project.qpproj file may be corrupted. In that case:
Rename or move that file somewhere safe in case you need to extract text from it. If the backup file fails, you will want to ask on the Image.sc forum!
Edit the extension of the project.qpproj.backup to remove the .backup. In some systems, you may need to change the file View settings to show extensions - I recommend looking that up online for your particular system.
Recovering from a corrupted project.qpproj file.
Finally, if you made it this far, here is a neat trick as a reward! You can both turn off the Analysis pane on the right by clicking on the ruler button, or undock the various components of the analysis pane and move them to other monitors!


