Thresholding
Creating non-manual annotations through pixel intensity information.
The following video demonstrates using the Simple thresholding tool to create regions of interest based on the pixel intensities in a single channel.
Thresholding
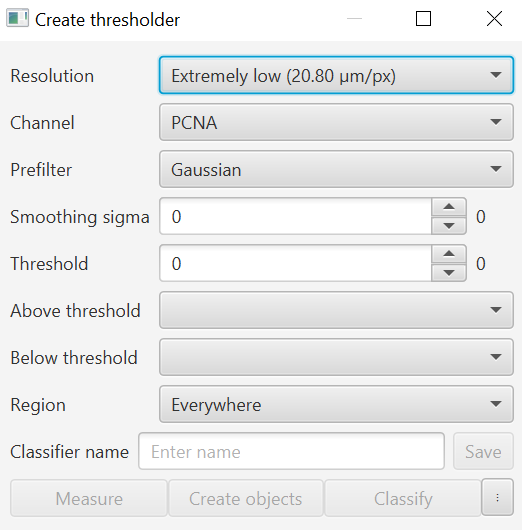
Overview of the interface: See another version of this with more graphics in the brightfield analysis section.
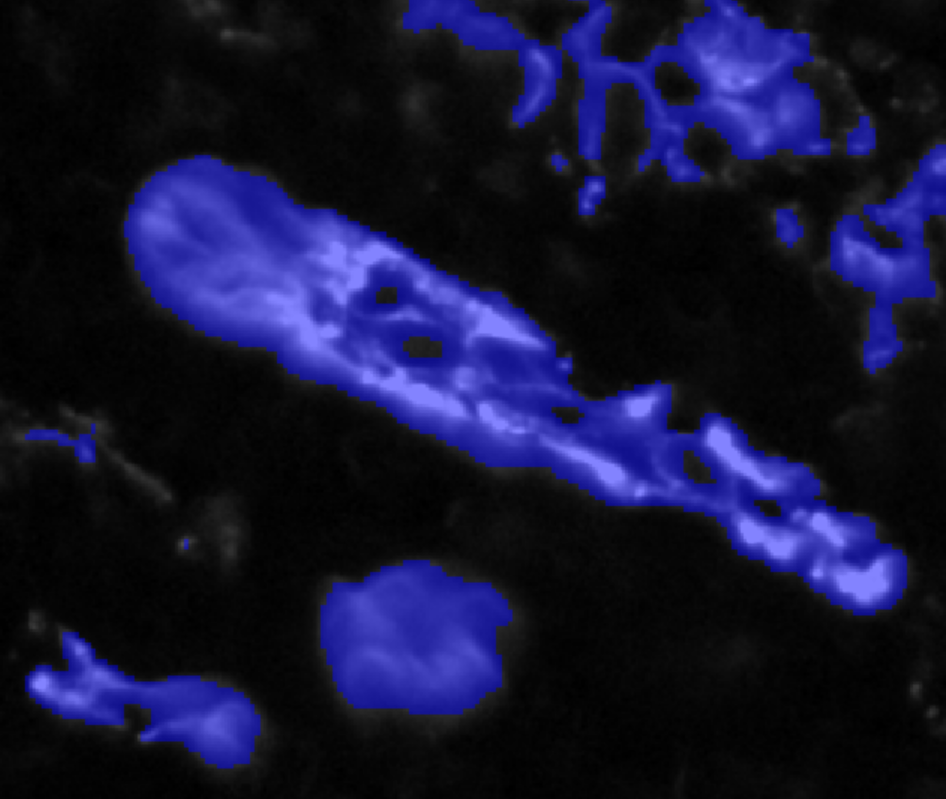
When adjusting the thresholder settings, it is recommended that you either use the “C” key to quickly toggle the overlay on and off, or move the opacity slider to ~50% so that you can see both the thresholded area and the image beneath. For this reason, it is often best to start by assigning classes to the Above or Below thresholds as a first step - otherwise the overlay will not be visible as you adjust the other settings. Additionally, it can be very useful to select “Use grayscale” in the Brightness & Contrast window for the channel you are thresholding. They grayscale usually provides decent contrast against
Resolution: high resolution is good for smaller objects and tighter edges, low is good when the the staining is sparse or you want to run things quickly. You can also always choose to fill holes if the staining is sparse as well, or use blurring, or other prefiltering methods.
Channel: The channel you are interested in. For simple thresholding, the user can only select one channel at a time.
Prefilter: The majority of the time it will be best to leave this as Gaussian. Essentially, you are applying some sort of blurring or filter to the image prior to thresholding, the size of which is determined in the next Smoothing sigma section. You can try some of the other options, I have occasionally found morphological closing to be useful as well, though usually the same effect can be achieved by excluding holes at the object creation step.
Smoothing filter: The number of EFFECTIVE PIXELS across which the filter is applied. This is very important for understanding how the smoothing will apply if you change resolution. For example, a smoothing sigma of 2 pixels at Full resolution will be 2 pixels, while at "High" resolution, which is downsampled twice such that each pixel is actually the average of 16 pixels, that same 2 "pixel" filter will be across 32 pixels.
Threshold: The numerical value above or below which there is a cutoff for the class assigned. Note that EQUAL to the threshold falls under BELOW, you can also see this in the mouseover text when hovering over the Above threshold and Below threshold dropdown menus.
Above and Below threshold: Where do you want to create your objects? Everything above a certain value, or everything below it? Or both? If you want an object for the background, include a classification for it, otherwise leave it blank or Unclassified or as Ignore*.
Region: Where within the image should the thresholder be applied? This may be useful if you only want to measure within current annotations previously selected. For example, if you create a tissue annotation and only want to find areas that are bright for a certain stain within that area, and not include bits of fuzz or other objects outside the tissue.
 Info: Beyond simple thresholding
Objects can be created with a variety of settings, like making individual objects for non-touching regions, or creating detections or annotations. Small objects can be excluded, and you can even choose for new objects to be set as “selected” which can help when scripting or performing a workflow.
Thresholder interface in QuPath 0.5.0rc1
Example of using a grayscale channel and 50% transparency in the overlay for visualization.
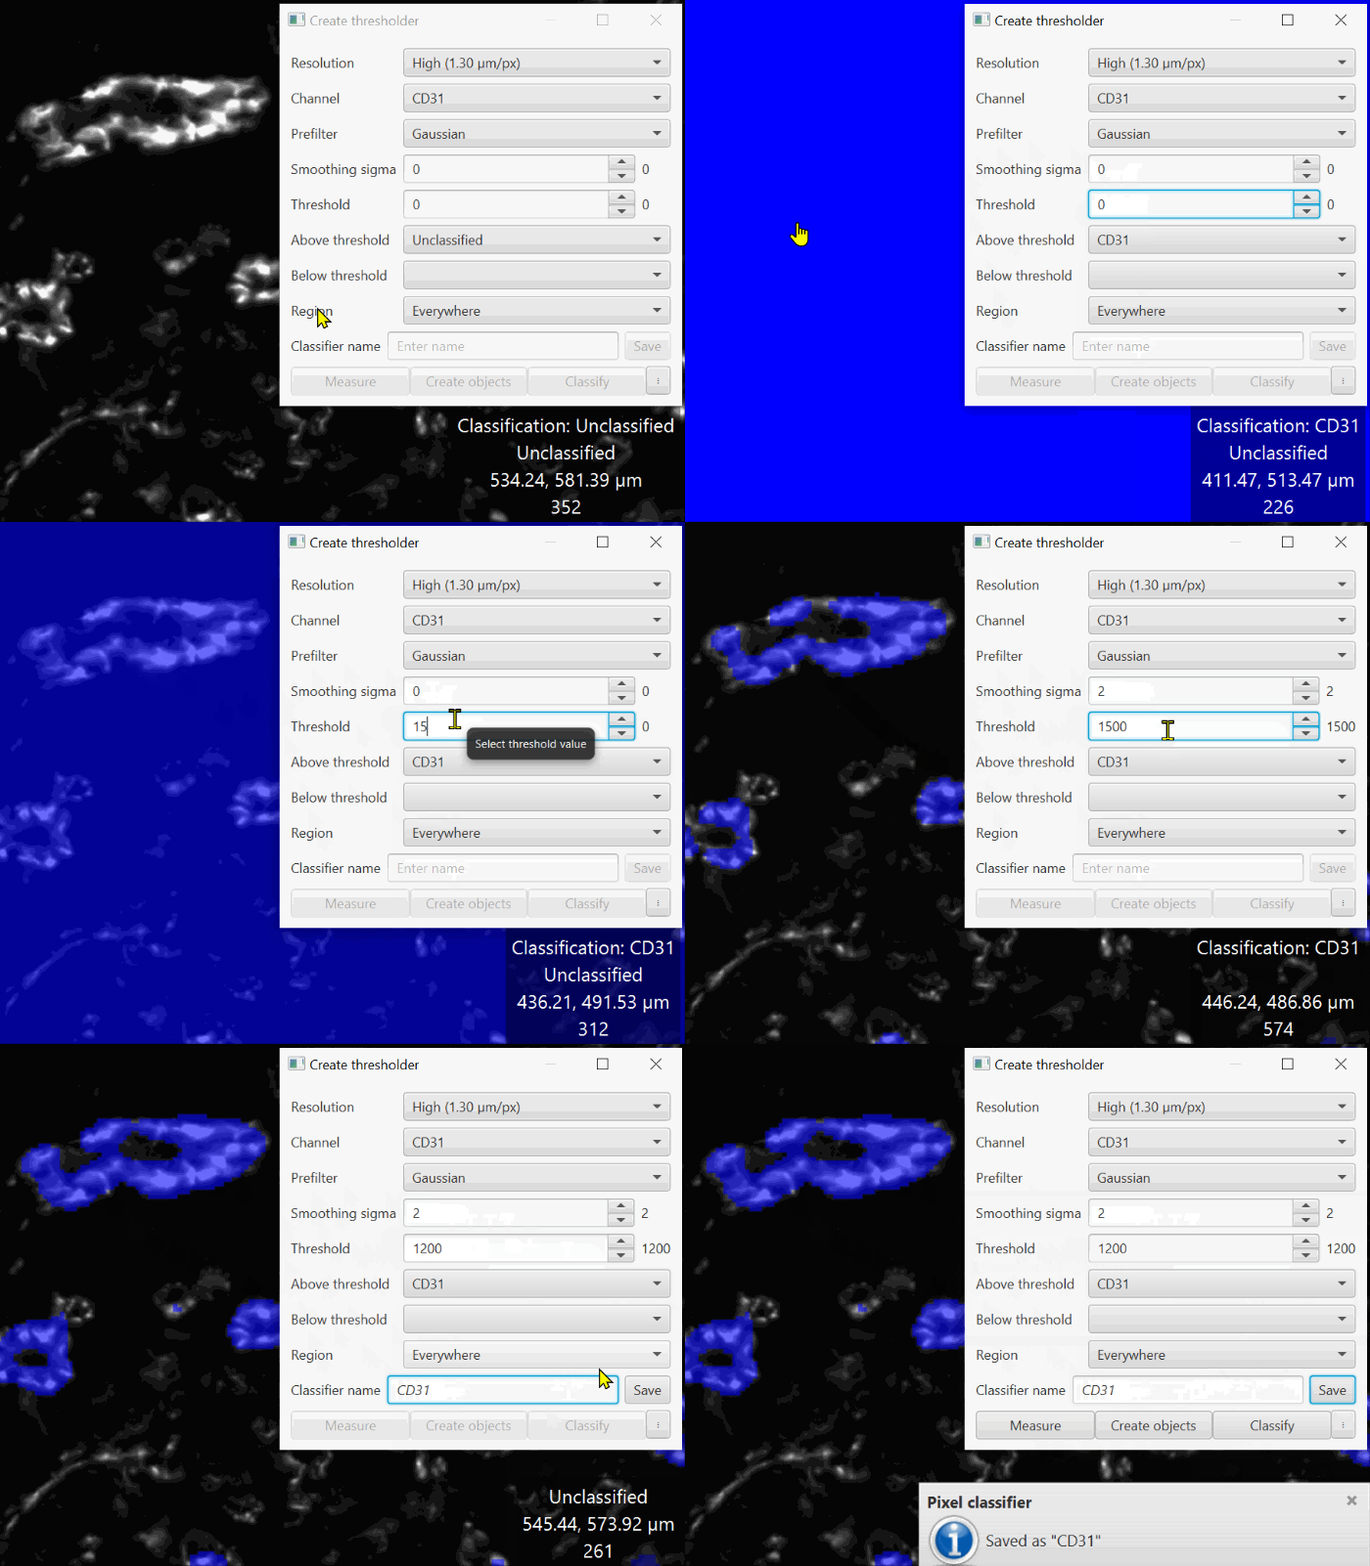
When thresholding it helps to have the transparency set so that you can see both the image data and the positive pixel overlay. Increasing the smoothing generally requires decreasing the threshold to detect the same signal area. After saving the classifier, the three buttons at the bottom of the dialog are enabled.
Once you have established the settings for the classifier, add a “Classifier name” and save the classifier. In order to do this, you must be working in a project. Once the classifier is saved, you can find the file in the project folder under “projectFolder/classifiers/pixelclassifiers/nameOfClassifier.json”.
After saving the classifier, the three buttons at the bottom of the interface become interactable. These allow you to “Measure” the area and % of each area within a given annotation or image, “Classify” detections based on the class of pixel that overlaps their centroid, or “Create objects” to create either annotation or detection boundaries around areas. The last option, creating area objects, is the most common use of the thresholder. Often this will be to identify tissue vs slide background in brightfield images, or tissue through the presence of some nuclear marker with sufficient blur/downsample in multichannel images. Alternatively, some microscopy images come with an autofluorescence channel that can be used to detect tissue.
 Saving the classifier
Measure can be used to generate area or percentage area measurements - the percentages are only generated when there are two classes and neither are ignored classes. This is shown below when the two classes selected are “Positive” and “Negative”.
Pixel classifiers can be used to classify detections based on the pixel that overlaps with the object’s centroid. This can be somewhat dangerous as one pixel exactly on the centroid of Class A means that the entire cell is Class A, even if 99% of the cell is Class B.


